


Hands-On LLM Quantization: transformers & bitsandbytes
Part 2 : Libraries, Coding and Architecture

In the first part of this series, we explored the foundational concepts of LLM quantization, covering the what, why, and how behind this powerful technique.
If you’re landing directly on this article or would like a quick refresher on the theory, I highly recommend starting with Part 1: A Beginner’s Guide to LLM Quantization.
Now, let’s get hands-on. In this article, we’ll introduce the essential libraries you need for quantization and walk you through a complete code example to show how to implement quantization in practice and transform architecture details.

Tools/Libraries for LLM Quantization
PyTorch & TensorFlow: Both major deep learning frameworks have built-in quantization modules (torch.quantization, TensorFlow Lite). These are great if you are building a model from scratch and need more granular control.
Apart from this, here are some of the top open-source tools and libraries for LLM quantization:

For this code walkthrough, I will focus on two essential libraries: Hugging Face transformers and bitsandbytes. Together, they allow us to load and quantize a model with just a few simple lines of code. Both transformers and bitsandbytes are built on top of torch. It's the foundation for everything.
This is the main, high-level library from Hugging Face. It provides the easy interface for almost everything we want to do with a language model.
This is a lower-level, specialized library that performs efficient, low-precision math on GPUs. It contains the actual code that knows how to convert numbers to 4-bit and 8-bit formats and how to use them in calculations.
This is another Hugging Face library that makes running models on different hardware (CPU, single GPU, multiple GPUs, Apple Silicon) seamless. Just a argument device_map = “auto” in the code can figures out the best way to load the model onto specific hardware without having to write complicated code.
A Code Walkthrough
For the purpose of learning, let’s use a small, friendly model called distilgpt2.
It's small enough to run on almost any latest home machines / laptops configuration. I have ran this code example directly in a Google Colab notebook.
Load the Tokenizer


Load the Model ( Model Architecture )


There are two main components in original Transformer architecture.
Decoder
Encoder
Since we using GPT-2 variants distilgpt2 , It was built using only the decoder part of the original Transformer architecture. Token embeddings represent the meaning of individual words while positional embeddings encode the order of words in a sequence.
wte: Word Token Embedding = 50,257 vocabulary tokens to a 768-dimensional embedding space.wpe: Positional Embedding = position indices (up to 1024) to 768-dim vectors.h: ModuleList of 6 GPT2Block layers – Each is a Transformer decoder block.Each GPT2Block includes
Layer Normalization
Self-Attention Layer
Feed-Forward Network
Final Layers
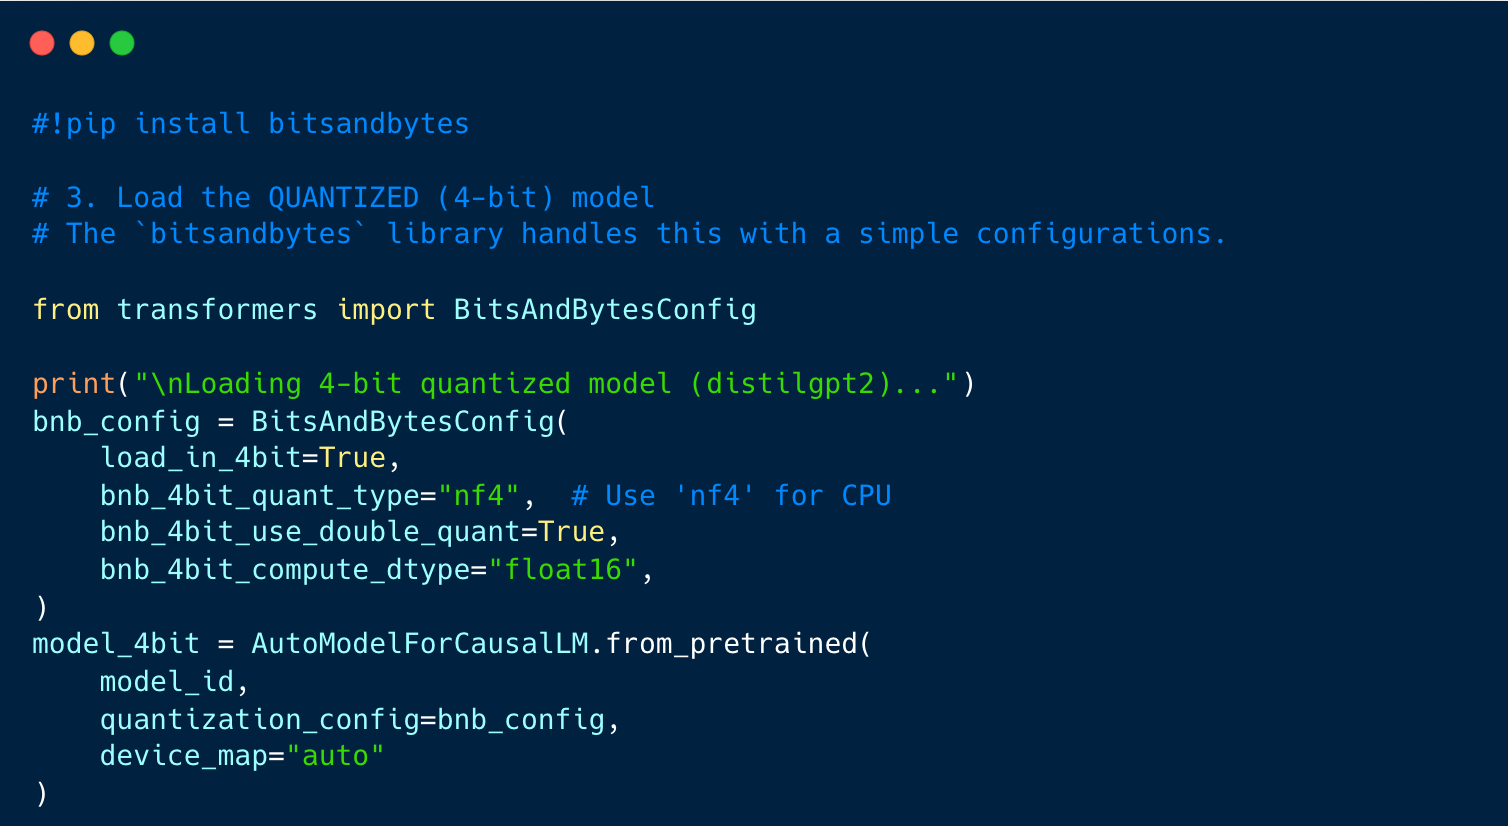
Load the Quantized 4-bit Model
Check memory usage

Full Precision Model Memory: 333.94 MB
4-bit Quantized Model Memory: 106.42 MB
Memory saved: 68.13% 🎉
Test the Model Output Quality

Result


Problem:
4-bit quantization, especially on CPU, reduces the precision of model weights. This can flatten the attention distribution and degrade language logical sense. The model defaults to greedy decoding, which
Always picks the most probable next token
Can easily fall into loops
Lets fix it with sampling parameters

do_sample=True: enables sampling (instead of greedy decoding)temperature=0.7: controls randomness (lower = more deterministic)top_k=50: limits sampling to top 50 tokenstop_p=0.95: uses nucleus sampling


When should avoid Quantization?
When your model is already small and fast (e.g., Tiny models)
During early-stage model development and evaluation
For tasks that involve complex logical reasoning
For tasks that are extremely sensitive (e.g., healthcare applications)